In this article, I will explain the most inexpensive and easiest way I know to transfer information stored on Mini DVs to DVDs. To keep this article as on topic as possible, I will have to assume you have some basic knowledge of video editing and DVD computer software (or are willing to take the time to go through your software's manuals.)
Things You Will Need:
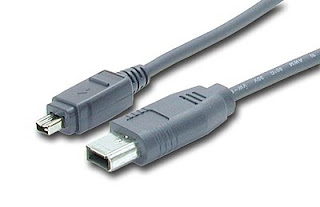
1) First, you need to get your computer and camera connected using the firewire or firewire to mini-firewire cable.
When you have correctly connected your video camera, the computer will usually make a sound similar to plugging in an external device like a mouse or hard drive. You will also have an indicator pop up in your start bar if you're using Windows.
When you have correctly connected your video camera, the computer will usually make a sound similar to plugging in an external device like a mouse or hard drive. You will also have an indicator pop up in your start bar if you're using Windows.
When you first open a video editing program, it will likely ask you if you want to start a new project. Go ahead and do this. At this point, you may need to familiarize yourself with your particular software. What you want to look for are three parts of your project--a timeline, a capture/digitizing window, and a "bin" (used for storing captured videos).
Find your capturing or digitizing window. You should see something that looks similar to VCR controls--play, pause, stop, record, etc. You may also see "In" and "Out" categories for entering time codes.
If you're wanting to do an entire mini DV tape to DVD, the easiest thing to do would be to rewind your tape to around 5 seconds before the point you want the DVD to start. Press the "Play" button, followed by "Record" immediately after that. The computer should start capturing the video within your 5 second buffer. When you reach your end point, press stop. You should see a movie clip appear in the "bin" section. This contains what was on your tape.
If you need to trim either end or even edit what you have, consult your video editing software's manual to do any last minute changes.
As a general rule, you settings should contain something about "NTSC standard" to play normally on U.S. DVD players. Audio for television is set at 48KHz (broadcast standard) and 44KHz is acceptable for consumer grade products.
If you have any visual or sound issues, you may have selected a wrong setting for the burning process. Every program is a little different, and the guidelines I'm giving are very general. You may have to consult your software manual for more information and troubleshooting.
7) If you would like to create a DVD with a menu, programs such as Encore (or any DVD burning program that takes .avi files) can be used for this.
You can bring up the movie file from where you captured, make any additions, and export it out to DVD similar to the way you did with the video editing software.
More Tips:
- Be sure if you're buying new software and equipment for this project that it is compatible with your computer's abilities.
- If this is a rare or one-time project, it may be financially better to consult video production companies in your area before spending a lot of money and time to do it on your own. This is something that shouldn't cost a lot to do.
No comments:
Post a Comment